Crochet flowers
& leaves
Small designs for in between: three flower shapes, two leaf variations and a spiral. Perfect for using up scraps, decorating bags or filling a wreath.
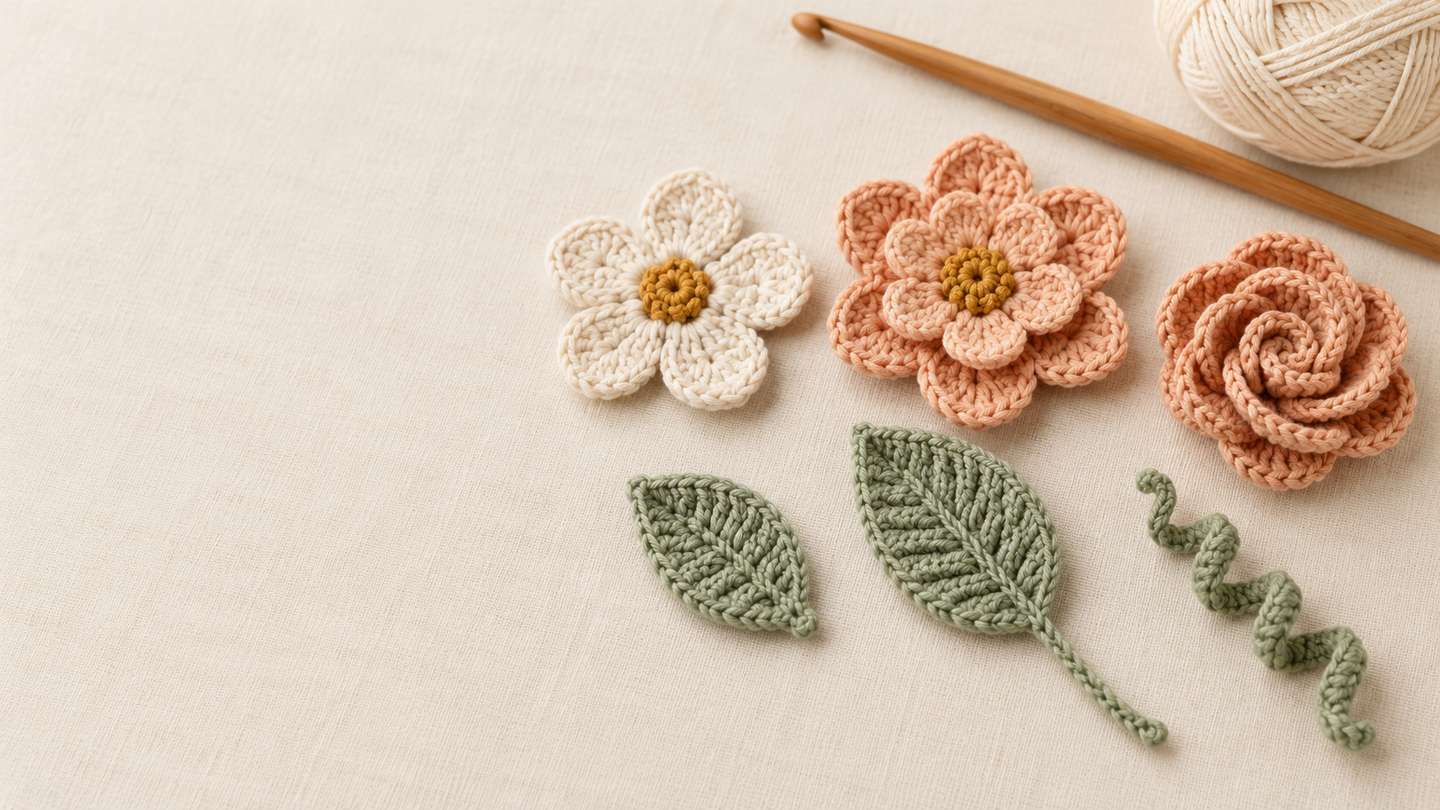
Small projects, big impact
Flowers and leaves are my favorite quick crochet projects. They need hardly any material, are done in fifteen minutes and can be combined endlessly – as a wreath on the wall, as an appliqué on a bag or simply as a little gift.
All six designs on this page start with a magic ring or a chain and only use basic stitches. If you know single crochet and double crochet, you can start right away. If not, take a quick look at the Crochet Basics first.
The designs are deliberately built on each other: Flower 1 is a single flat layer, Flower 2 gets a second layer of petals underneath, and Flower 3 is rolled instead of worked in rounds. Crochet them in this order and you'll have learned three different techniques by the end.
Note: This pattern uses US crochet terms (sc = single crochet, dc = double crochet).
Materials & abbreviations
What you need
- Leftover smooth cotton yarn in flower and leaf colors
- 3.0 mm crochet hook (or to suit your yarn – rather one size smaller)
- Tapestry needle with a large eye
- Scissors
- Optional: small buttons or beads for the flower centers
- Optional: metal or wooden ring as a wreath base
Abbreviations used (US terms)
| ch | Chain |
| sl st | Slip stitch |
| sc | Single crochet |
| hdc | Half double crochet |
| dc | Double crochet |
| tr | Treble crochet |
| MR | Magic ring |
| [ ] | Work contents into the same stitch |
| * … * | Repeat |
The magic ring
Almost every flower starts with a ring you can pull tight at the end – this creates a closed flower center without a hole. There are two ways to get there.
- Option AMagic ring: Form the yarn into a loop, insert your hook, grab the working yarn and pull it through as a loop. Secure it with 1 ch. Work all stitches of round 1 into this ring, then pull the loose tail tight at the end.
- Option BChain ring: Ch 5 and join with 1 sl st into the first ch to form a ring. Work the stitches of round 1 into the center of the ring. A bit easier, but the center stays slightly open.
For beginners, option B is more relaxed. Once you feel more confident, the magic ring is worth it – the flower center looks much neater.
Flower 1: The simple five-petal flower
Single-layer flower
2 rounds · approx. 5 cm
The beginner design: a flat flower with five round petals, made in one go. Ideal as an appliqué on bags or hats.
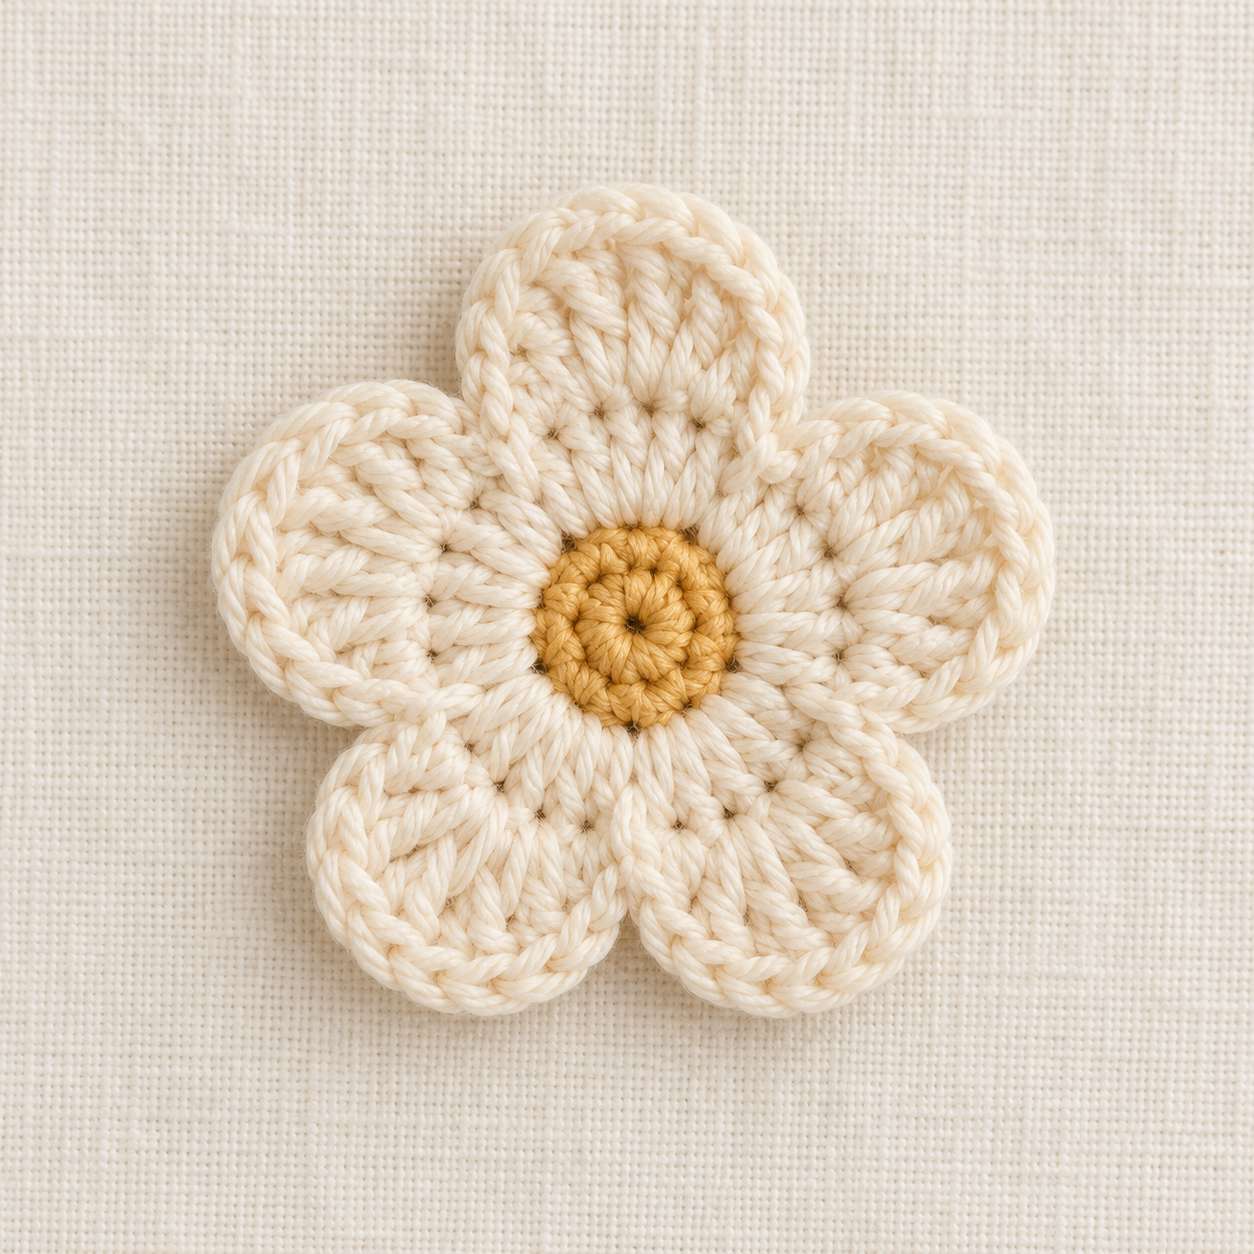
- Rnd 1Work 15 sc into the MR, join with 1 sl st into the first sc. (15 sts)
- Rnd 2Now make 5 petals over 3 stitches each: 1 sc in the next st, [1 hdc, 3 dc, 1 hdc] in the following st, 1 sc in the next st – repeat 4 more times. (5 petals)
- FinishJoin with 1 sl st into the first sc, cut the yarn and weave in the ends.
For the flower center you can sew on a small button or bead. Or crochet the first round in a second color – then the center shines all on its own.
Flower 2: The double-layer flower
Flower with two layers of petals
5 rounds · approx. 8 cm
Here a second, larger layer of petals sits behind the first – making the flower three-dimensional instead of flat. The trick: the bottom layer is worked into chain loops that you attach behind your work.
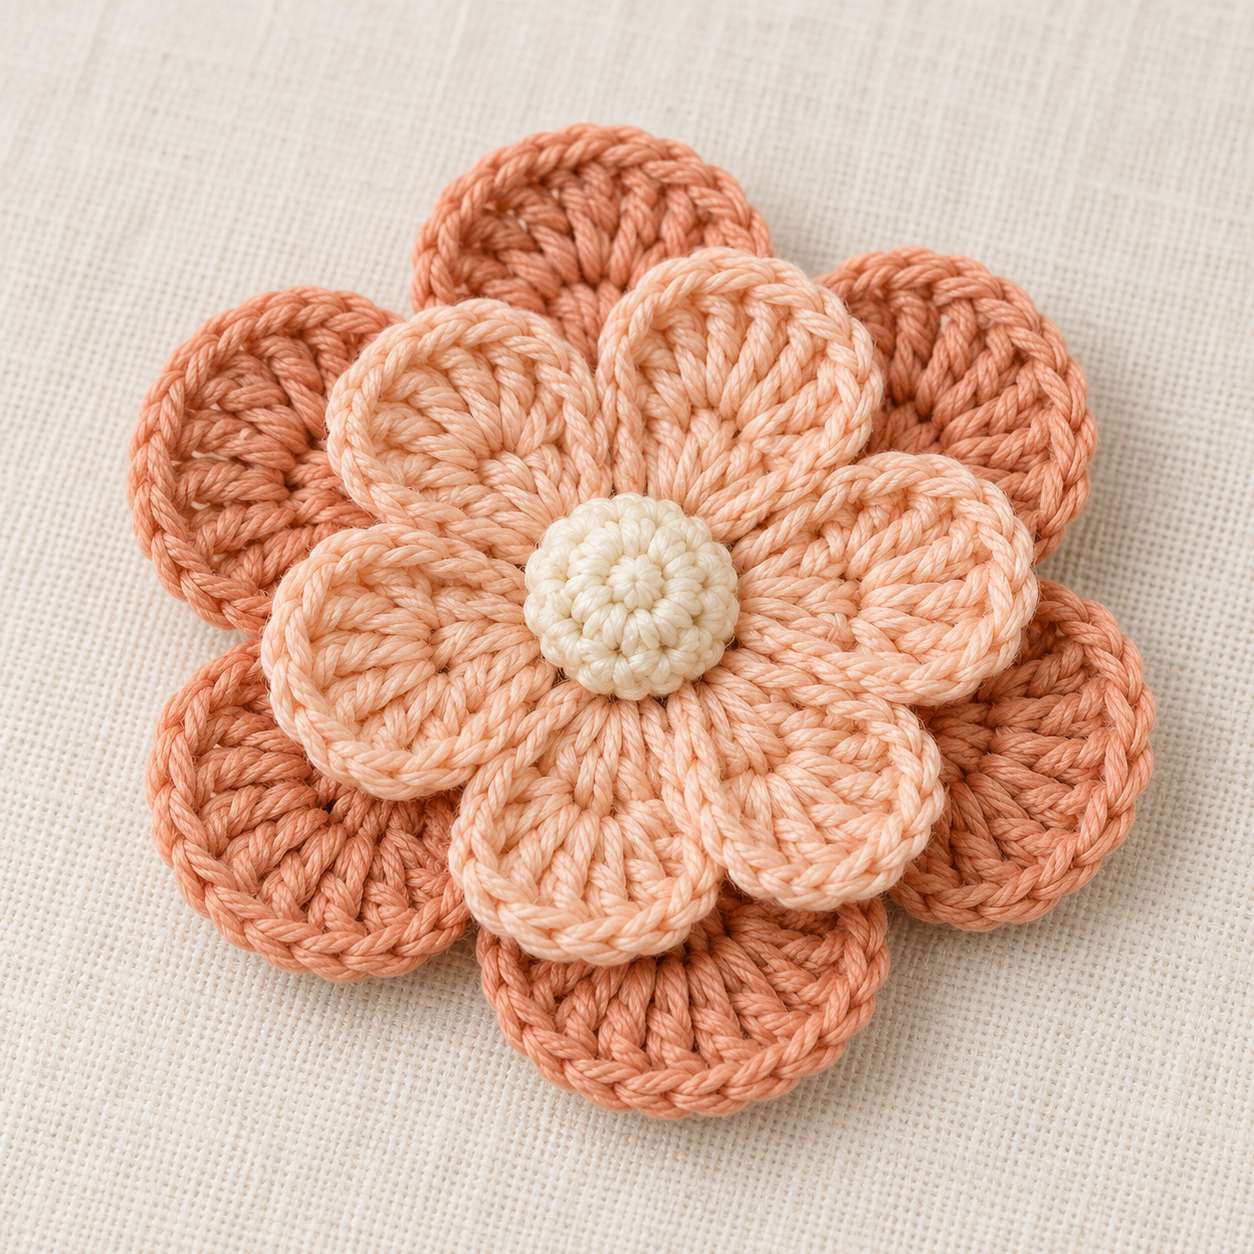
- Rnd 112 sc into the MR, join with 1 sl st. (12 sts)
- Rnd 21 sc in the next st, ch 3, skip 1 st – work 6 times in total, join with 1 sl st. (6 loops)
- Rnd 3Into each chain loop: [1 sc, 1 hdc, 3 dc, 1 hdc, 1 sc]. (6 small petals)
- Rnd 4Now reach behind your work: attach the yarn with 1 sl st around the post between two sc of round 2, then ch 5, 1 sl st around the next post – 6 times all around. (6 back loops)
- Rnd 5Into each back loop: [1 sc, 1 hdc, 5 dc, 1 hdc, 1 sc]. (6 large petals)
- FinishJoin with 1 sl st, cut the yarn and weave in the ends.
For a color gradient, change colors after round 3 – a darker shade for the bottom layer makes the flower look much deeper.
Flower 3: The spiral rose
Rolled rose
1 row · approx. 6 cm
This flower isn't crocheted in rounds but as a long strip that you roll up into a rose afterwards. It looks elaborate, but it's the quickest flower on this page.
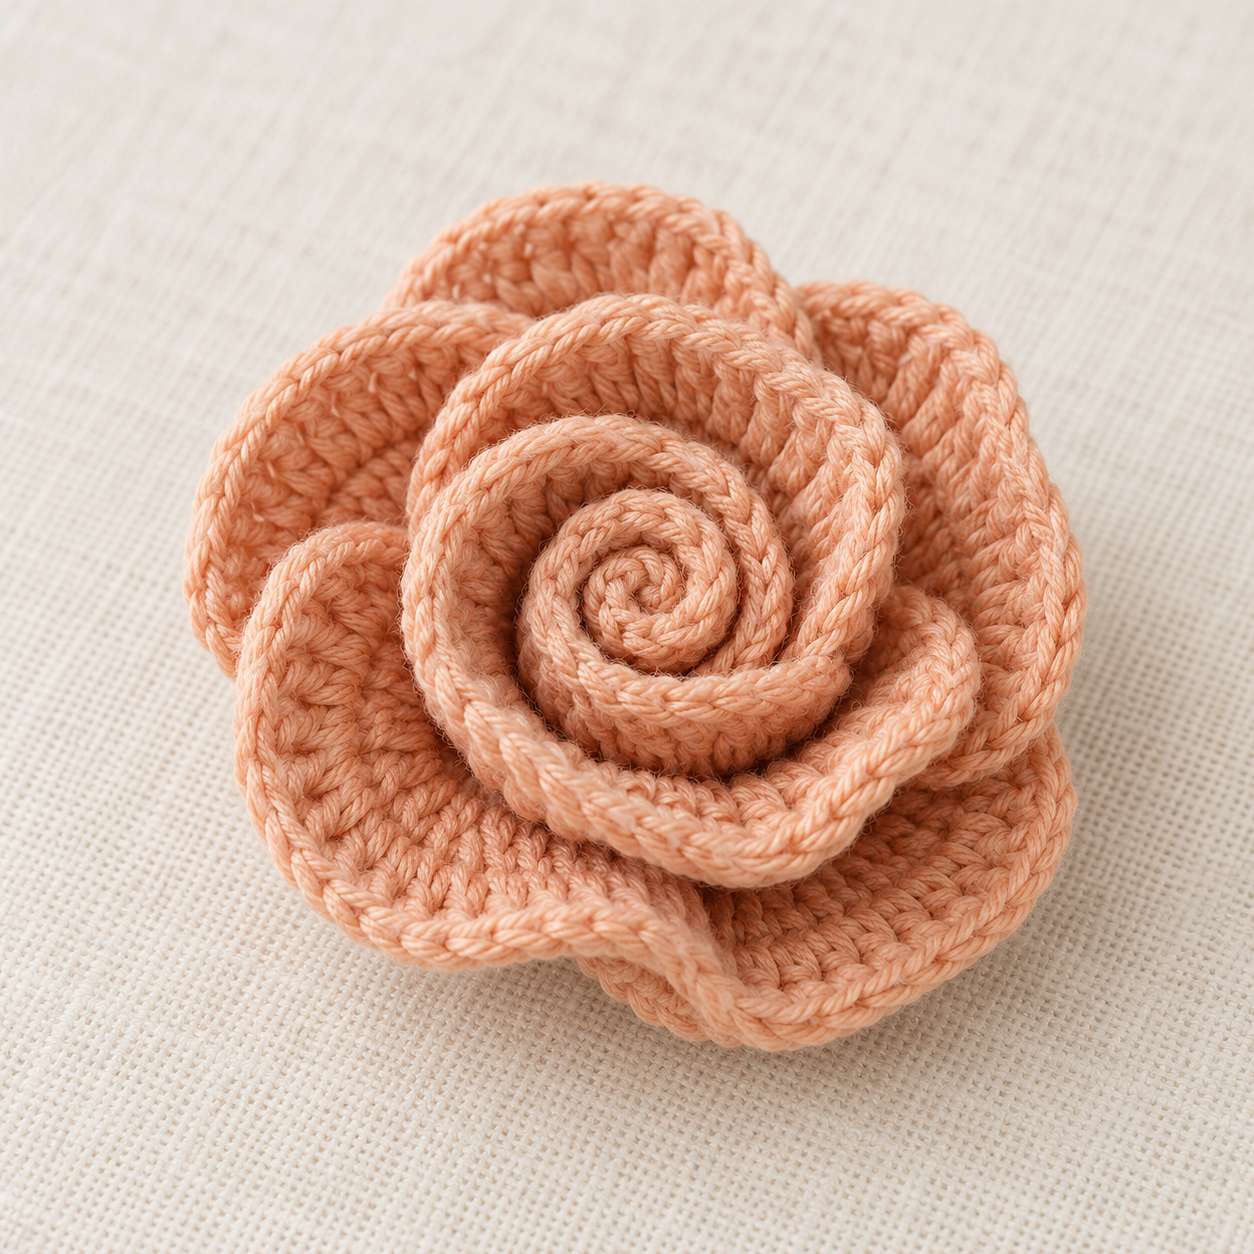
- ChainCh 30.
- Row 1Work 2 dc into the 3rd ch from the hook. Then work 2 dc into every remaining ch as well. (approx. 56 dc)
- RollCut the yarn, leaving a long tail. Loosely roll the strip into a spiral from one end – the bottom edge forms the base of the flower.
- SecureUse the long tail to stitch through all layers at the bottom and secure the roll with a few stitches.
The more double crochets you work into each chain, the fuller the rose. With 3 dc per ch you get a lush bloom, with just 1 dc a slender bud.
Leaf 1: The simple leaf
Single-layer leaf
1 round · approx. 4 cm
A slim leaf worked all around a foundation chain. The tip forms all by itself when you work several stitches into the same chain at the end.
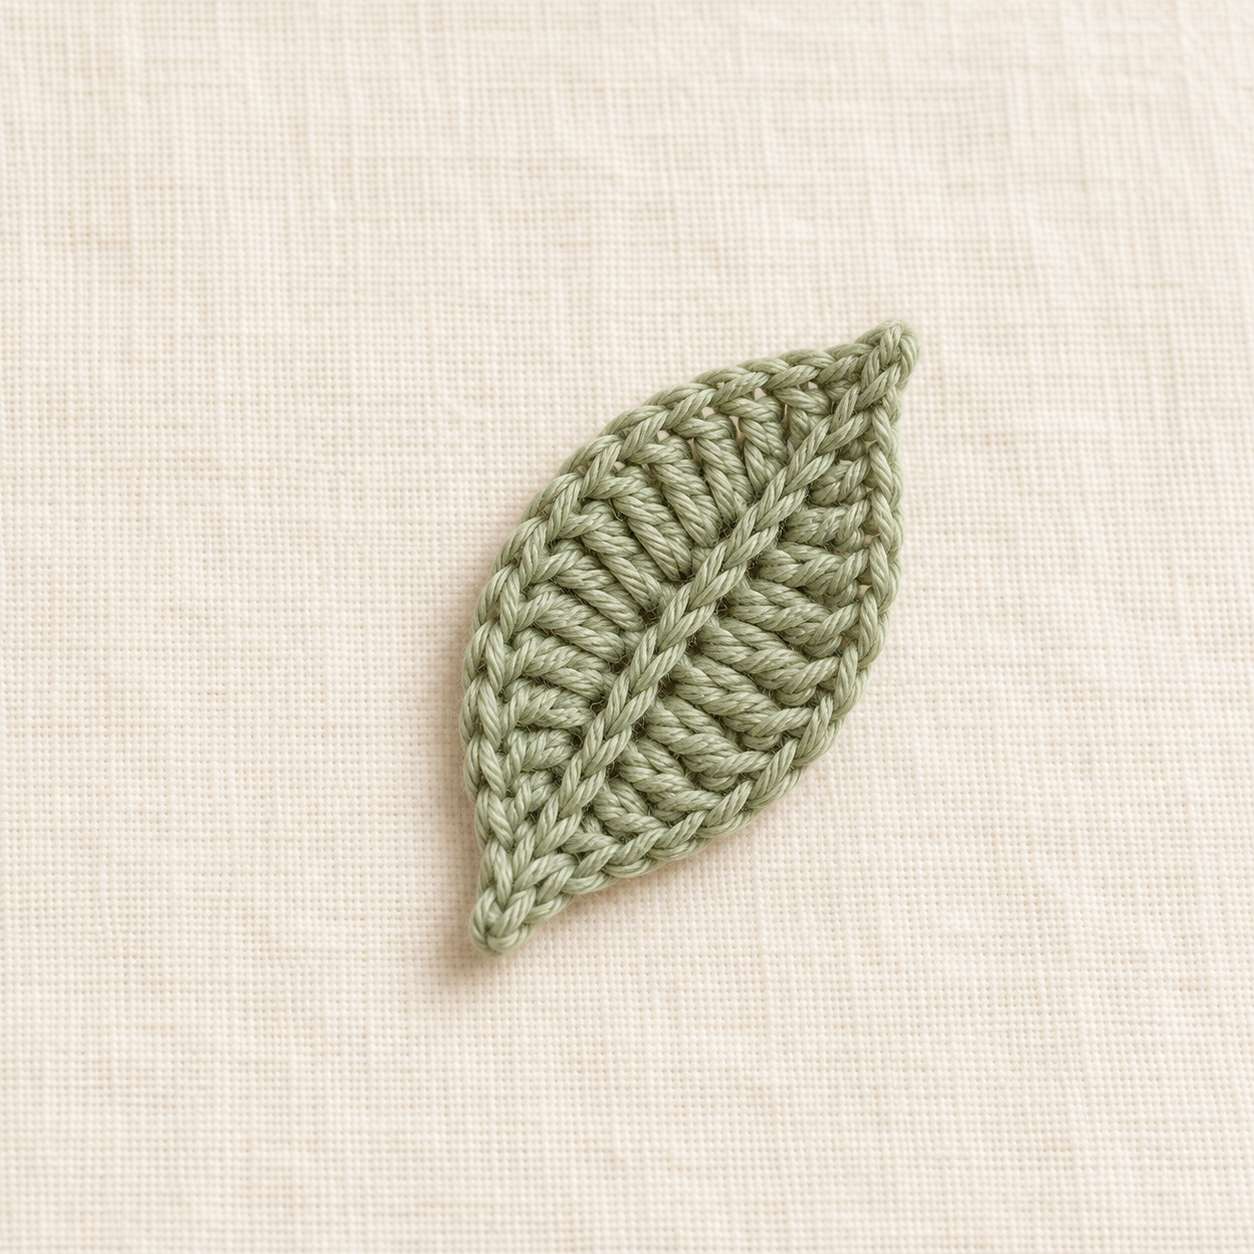
- ChainCh 10.
- First sideStarting in the 2nd ch from the hook: 1 sc, 1 hdc, 5 dc, 1 hdc – work up to the last ch.
- TipWork 3 sc into the last ch – this forms the tip of the leaf.
- Second sideWork back along the other side of the chain into the free loops: 1 hdc, 5 dc, 1 hdc, 1 sc.
- FinishJoin with 1 sl st into the first sc, cut the yarn.
Want a wider leaf? Replace the 5 dc with 3 dc and 2 tr – this makes the middle noticeably fuller.
Leaf 2: The leaf with stem
Leaf with crocheted stem
1 round + stem · approx. 7 cm
The same basic shape as leaf 1, just bigger and with a stem crocheted right on. This lets you attach the leaf to a wreath or branch later without a visible seam.
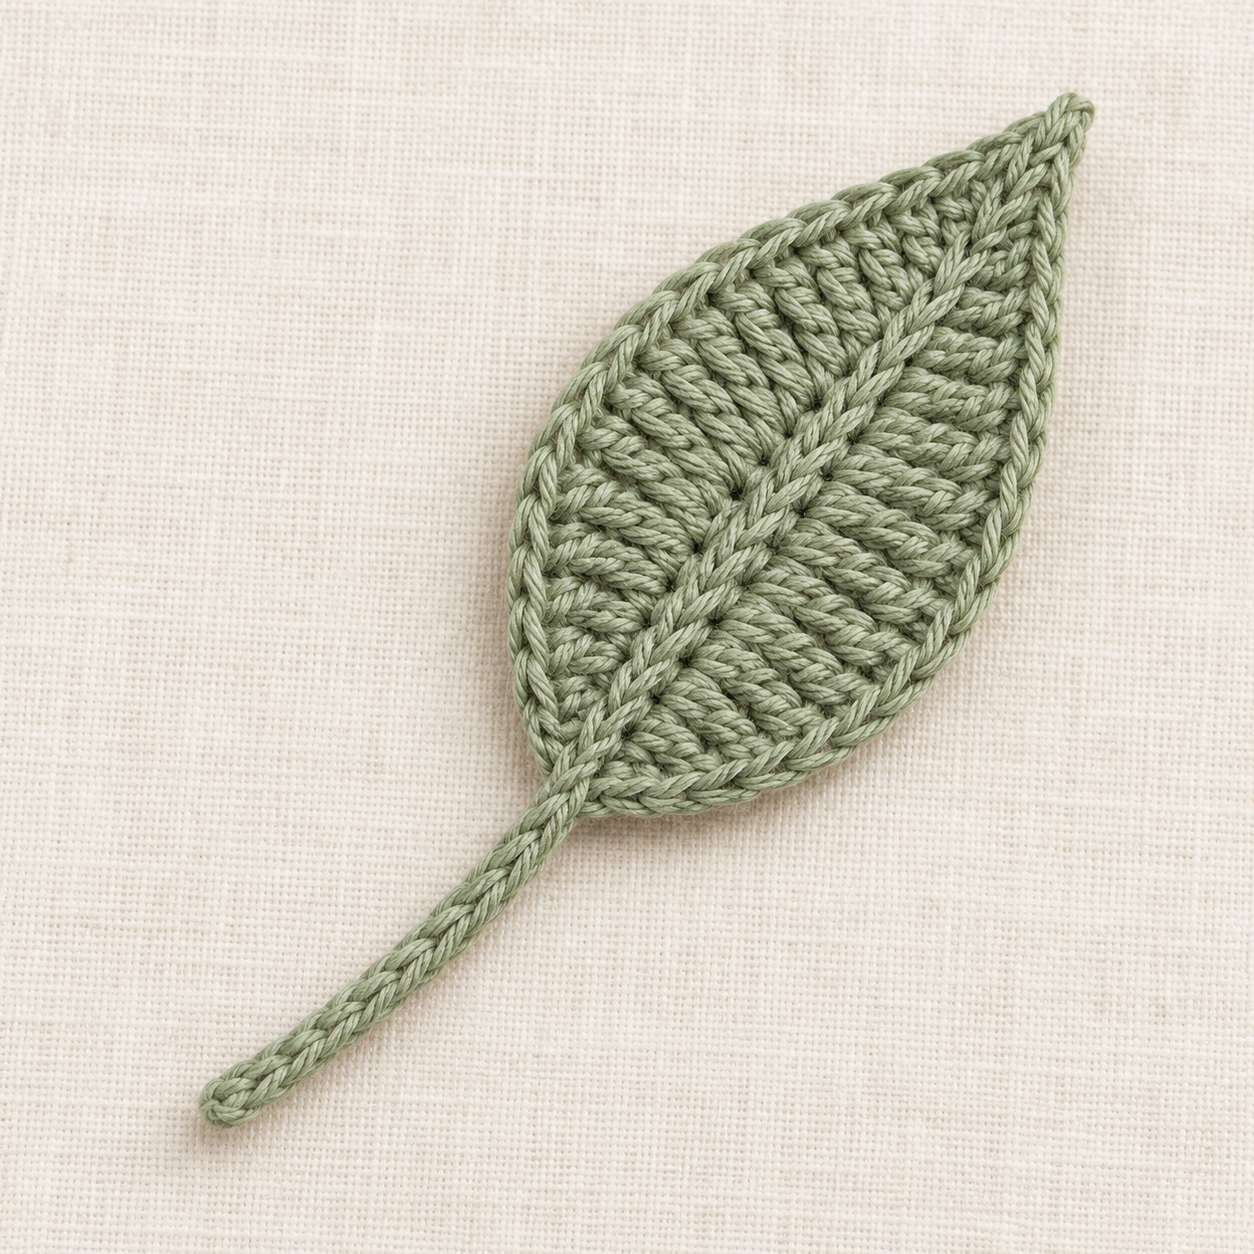
- ChainCh 14.
- First sideStarting in the 2nd ch from the hook: 1 sc, 2 hdc, 3 dc, 3 tr, 2 dc, 1 hdc.
- TipWork 3 sc into the last ch.
- Second sideBack along the other side: 1 hdc, 2 dc, 3 tr, 3 dc, 2 hdc, 1 sc.
- StemDon't cut the yarn: ch 8, then work 1 sl st back into each of these 8 ch. (stem approx. 3 cm)
- FinishEnd with 1 sl st at the base of the leaf, cut the yarn and weave in the ends.
For a pair of leaves, simply crochet the second leaf onto the stem of the first instead of cutting the yarn – this creates a natural-looking little branch.
Bonus: The corkscrew vine
Twisted vine
1 row · any length
The vine curls into a spiral all by itself as you crochet – because you work several stitches into each chain, so the fabric needs more length than the chain provides.
- ChainCh 25 (or more for a longer vine).
- Row 1Starting in the 2nd ch from the hook, work 3 sc into each ch. The work twists up automatically.
- FinishCut the yarn and weave in the ends, then shape the spiral with your fingers.
Want more twist? Work 4 sc instead of 3 into each chain – the vine will curl much tighter. With 2 sc it stays almost straight and works better as a cord.
What you can make with them
Wall wreath
Arrange flowers, leaves and vines on a metal ring and sew them on – lay out first, then secure.
Bag appliqué
Sewing a single flower onto a crocheted bag turns a simple piece into a one-of-a-kind.
Gift tag
Tie a small flower to the bow with a piece of yarn – prettier than any store-bought card.
Bouquet
Thread flowers onto floral wire, wrap with floral tape and tie them into a bouquet that never wilts.
My tips
Crochet on the tighter side
Loose stitches make flowers look limp. Use a hook one size smaller than the yarn label suggests, and the petals will keep their shape.
Lay out first, then sew
For wreaths and appliqués, lay everything out first and take a photo. The second arrangement often looks better than the first.
Odd numbers look more natural
Three or five flowers per group look livelier than four. The same goes for leaves – asymmetrical is better than perfectly spaced.